
While Animal Crossing is a simple game, overall, there are a lot of things you can do and a lot of places you can go. It can be difficult to know what these different places do when you are unfamiliar with the game. Here we’ll discuss the different locations of Animal Crossing, how to access them, and the purposes they serve.
Your House
You can’t have a life simulation game without a house! While the whole island is yours to do with as you please, you still share it with your villagers or maybe other players. You need a spot that’s yours and yours alone. Plus, would it really be an Animal Crossing game if you aren’t continuously in debt to a raccoon?
Your first important task when you begin the game is to place your home. You’ll begin with a small tent. Then once you’ve paid off your first debt with Nook Miles, you’ll upgrade to a house and begin the cycle of paying off the previous debt to upgrade to a larger house and acquire even more debt.
Overall there are eight stages in the growth of your house. Whenever you start a stage, you’ll receive the accompanying debt. After paying it off, you can then ask Tom Nook to upgrade your house. The first two upgrades increase the size of your house. Every upgrade after that increases the space you have by adding more rooms. Each upgrade also adds storage slots.
- Tent
- 5,000 Nook Miles
- No Storage
- House
- 98,000 Bells
- 80 Storage Slots
- House Size Upgrade
- 198,000 Bells
- 120 Storage Slots
- Back Room
- 348,000 Bells
- 240 Storage Slots
- Left Room
- 548,000 Bells
- 360 Storage Slots
- Right Room
- 758,000 Bells
- 400 Storage Slots
- Second Floor
- 1,248,000 Bells
- 800 Storage Slots
- Basement
- 2,498,000 Bells
- 1,600 Storage Slots
Some upgrades add additional features besides an increase in space. When you add the left room, you’ll unlock the ability to customize your roof color and mailbox. Then the right room upgrade will unlock door customization. Once you add an upstairs, you gain the most control over your house as you can now choose the shape and siding!
The basement upgrade is the only one that doesn’t need to be paid off. Since there are no more upgrades, you can enjoy a huge house and ignore the millions of bells Nook wants from you. However, there are benefits to paying it off. First, it feels good. I love the accomplishment of being debt free and not seeing the little pay debt button on the ABD. Though I understand not everybody shares that motivation. Another perk is unlocking free exterior customization. Once your final debt is paid, you can change the exterior of your home once a day without charge. Which essentially makes it always free since it takes a day to do the renovations anyway. Finally, you’ll be able to buy more upgrades for your home storage, up to 5,000 slots. As someone who tends to hoard items, this made the final loan necessary.
Island Features
Some locations in Animal Crossing are a part of your island from the very beginning. They can’t be changed or customized like most aspects of the game, but all have some kind of variation in color or location. These variations are just left up to chance rather than your control.
Resident Services
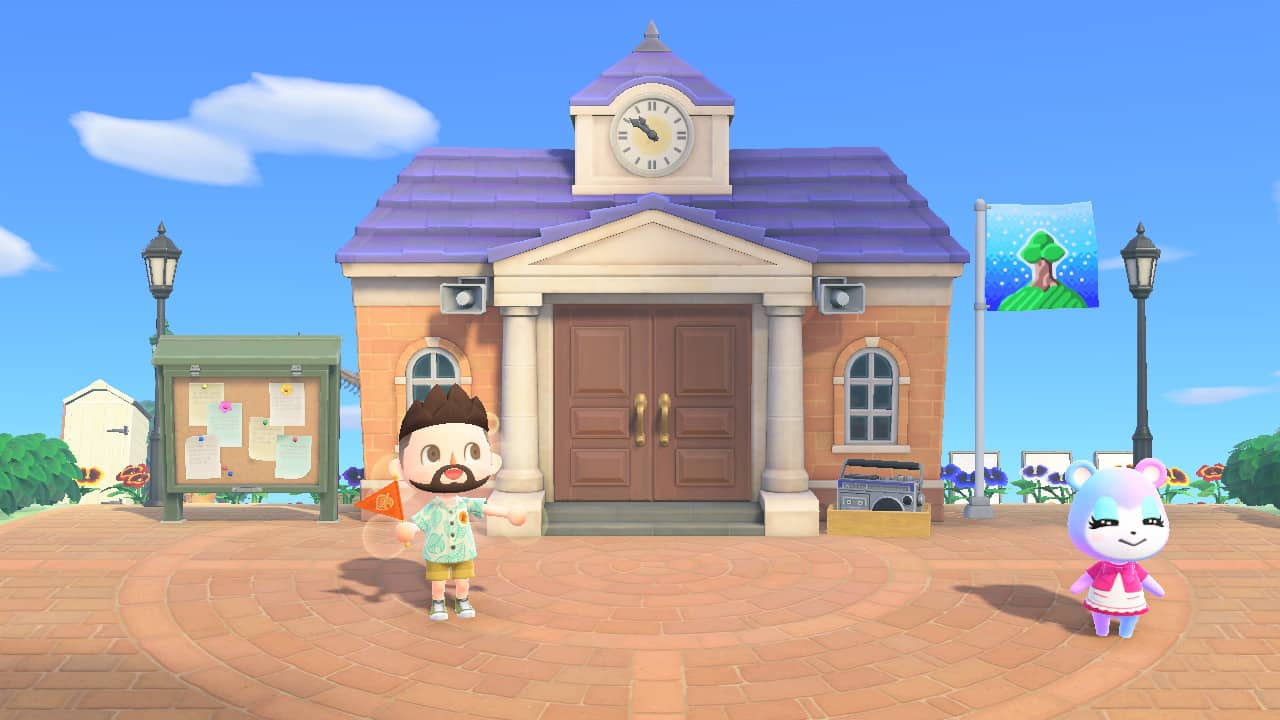
The biggest and most important building on your island is Resident Services. It serves as a headquarters as you develop your island, then as a central hub when it’s grown. This is where you go to run your island and use the services provided by Tom Nook and Isabelle. Outside the building is the plaza where town events will occur, and your villagers can hang out.
Most locations are primarily either indoors or outdoors. However, resident Services has functional features inside and outside.
Interior Features
- Access to Nook Stop
- Redeem Nook Miles
- Nook Shopping
- ABD
- Invite Amibbo Camper
- DIY Workbench
- Recycling Bin
- Tom Nook’s Services
- Instructions to progress the game
- Moving buildings
- Building bridges and staircases
- Destroy bridges and staircases
- House customization
- Isabelle’s Services
- Island Evaluations
- Discussion of a Resident
- Island Tune
- Island Flag
- Ordinances
Exterior Features
- Flag Pole
- Group Stretching
- Bulletin Board

Resident Services is immediately available and doesn’t need to be unlocked, but it does get upgraded. In the beginning, Resident Services is a tent with Tom Nook and Timmy. There is a DIY workbench, recycling bin, and a Nook Stop. Tom Nook offers classes on important game mechanics, like crafting, and Timmy buys and sells things.
Once five villagers have moved to your island, Tom Nook will upgrade the tent, Isabelle will join him, and you’ll have full access to the Resident Services features. However, there are four other tasks to complete before you can move new villagers to your island. You’ll need to pay off your Deserted Island Getaway Package debt, upgrade to a house, unlock Nook’s Cranny, and build a house. If you get stuck in the early game, you can talk to Tom Nook and ask what to do next to get instructions.
The appearance of Resident Services is always the same. The location of Resident Services differs depending on the island layout chosen at the beginning of the game. In most cases, Resident Services is close to the airport, toward the front and middle of the island. Some layouts have Resident Services a bit farther away or farther to the side, but it’s always on a larger section of land shared by the airport.
Airport

Off the frontal coast of your island, there is a large dock that houses the airport and seaplane you’ll use to travel, all run by DODO airlines. Wilbur flies his seaplane with a cool attitude, and his brother Orville staffs the desk, ensuring you get to where you want to go.
Features
- Opening your island to visitors
- Visiting other islands
- Going to Harv’s Island
- Going to Nook Miles Islands
- Going to Happy Home Paradise
- Sending mail
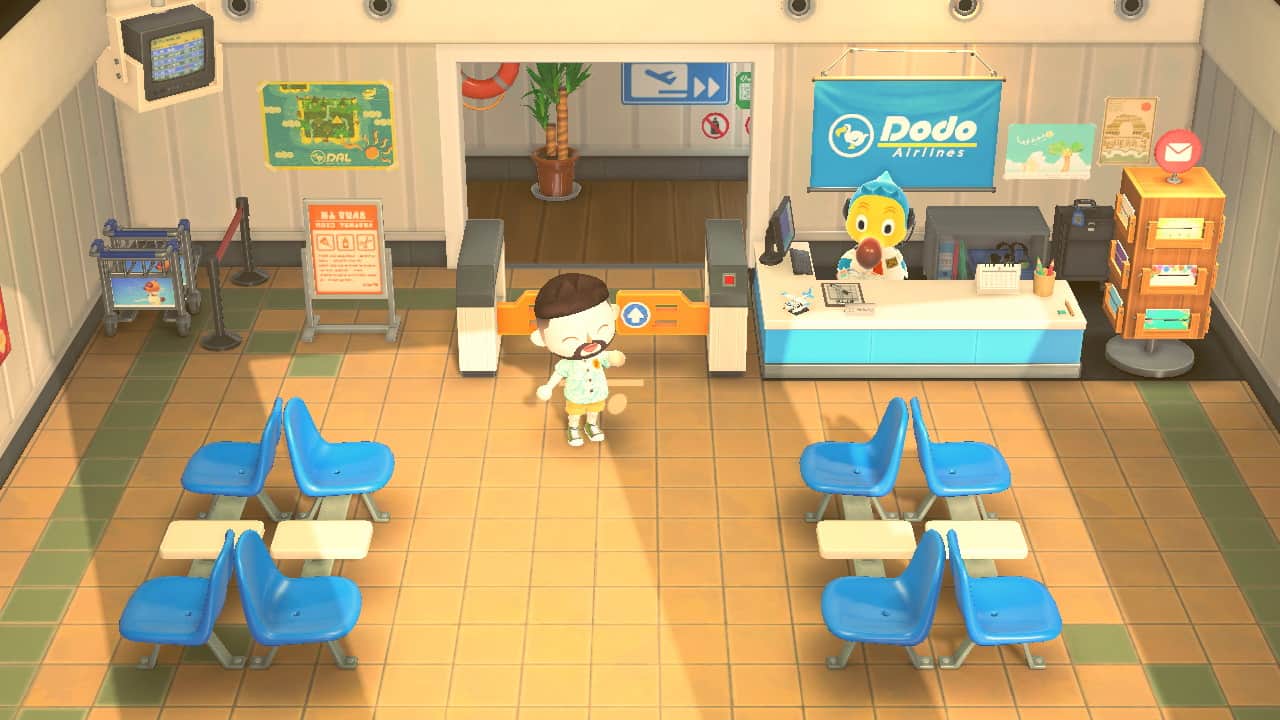
The airport varies in both location and color. It will always be on the front beach of your island but can be anywhere except the very edges of the beach. On the island map, it will appear as a black rectangle, so you have limited control over where it is. The color is completely random when you start the game. It will be either yellow, orange, blue, or green, and the plane floating next to it will match.
Like Resident Services, you have immediate access to the airport and will unlock certain services as you play. You can visit islands, host visitors, and send mail immediately. To see a Nook Miles island, you’ll first have to buy a Nook Miles ticket. To unlock Harv’s Island, you’ll have to wait until you find Harv wandering around your island and talk to him. Going to Happy Home Paradise requires purchasing the Happy Home Paradise DLC, but there are no in-game requirements to unlock it.
Pier

What kind of island paradise doesn’t have a picturesque dock to sit on and look out at the ocean? There’s something attractive about the simple wooden dock going out over the water. I have organized some parts of my island, specifically around the pier, and I know I’m not alone. It’s simple and not as integral to the game as Resident Services or the Airport, but it’s certainly fun.
Features
- Kapp’n’s Boat Tours
- Fishing
The pier can be found on either the left or right beaches, near the front of the island. It comes in two sizes, with the longer one nearly double the size of the shorter one. Other than that, there isn’t much variation to the pier, though you can place items and custom designs on it, so you are free to decorate it as you wish.
While the pier is on the island from the very beginning, you don’t have immediate access to it. Every starting layout has a river separating the airport and resident services from the beach with the pier. This means you won’t be able to get to the dock until you have a vaulting pole by getting the recipe from Blathers.
Once you have access to the pier, you still won’t be able to use it to its full potential. You can immediately go fishing off it, and you’ll be able to catch regular ocean fish and fish exclusively caught at the pier. Blue Marlin, Giant Trevally, and Mahi-Mahi are all available off the dock during the summer and some of the fall with varying months. Tuna is available during the rest of the year. All pier fish are rare or very rare, and the cheapest goes for over 5,000 bells at Nooks Cranny. So even for casual fishing, it’s a good idea to do it off the pier for a chance at some good fish.
The other pier feature, Kapp’n, has to be unlocked. Once Isabella comes to your island, and you achieve a three-star rating, Kapp’n will appear on the pier the next day. He’ll lay in his boat toward the end of the pier, and once a day, you can pay 1,000 Nook Miles to go on a boat tour. After a lovely cut scene of Kapp’n serenading you, you’ll arrive at a random island, much like a Nook Miles tour. However, these islands aren’t bound by the current time or season and offer new resources. Here are the possible islands:
- Fruit Island
- Crop Island
- Vine and Glowing Moss Island
- Money Tree Island
- Winter Island
- Cherry Blossom Island
- Autumn Island
- Summer Island
- Shooting Star Island
Secret Beach
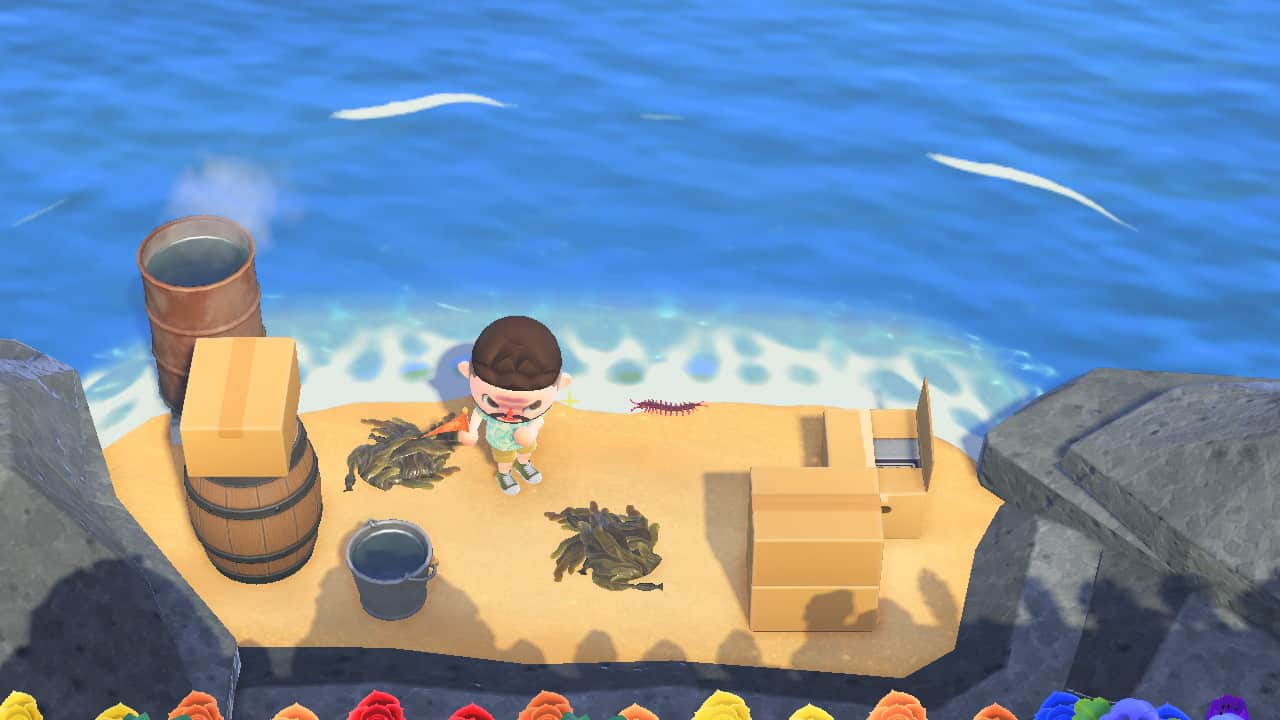
When Animal Crossing New Horizons first came out, there was a lot of curiosity about the strange, tiny beach at the back of the island. Many people turned it into a beautiful hideaway, a romantic picnic spot, or even a grand stage for a toilet. So imagine our surprise when we received our first major update, and Redd parked his shady boat in front of our private paradises. Now the secret beach is mainly seen as a skeezy black market area, but I’m sure that won’t stop anyone who wants a tiny private beach.
Features
- Redd’s Treasure Trawler
Unlike the other island feature locations, the secret beach only has one actual purpose. Being a hidden dock so Redd can try to scam you beyond the watchful eye of Tom Nook. But beyond that, it’s still a decorative portion of land so that people can find their own uses for it.
The arrival of Redd coincides with the upgrade of the museum, which we will discuss in more detail later. The short version of how to get Redd to visit your island is simply to donate fish and bugs to the museum. Once you’ve donated enough, Blathers will express interest in adding art to the museum. Redd will appear on a regular beach the next day. Once you find him and buy art from him, he’ll begin arriving at your secret beach roughly every other week.
The Treasure Trawler itself is slightly different from other iterations of Redd’s shops. Redd sells six items in his boat, four works of art, and two furniture items. The furniture will be at a higher price than it would be at Nook’s Cranny but is typically stuff that is harder to find. The art can be genuine or fake; you can only buy one piece daily. There’s no guarantee that there will be an authentic piece, and there is a possibility of multiple pieces being genuine. You’ll just have to inspect the art and choose what you want to buy.
Unlockable Buildings
All the locations listed in this section are locations that you must unlock. They all have one look, but you can place them wherever you want on your island.
Nook’s Cranny
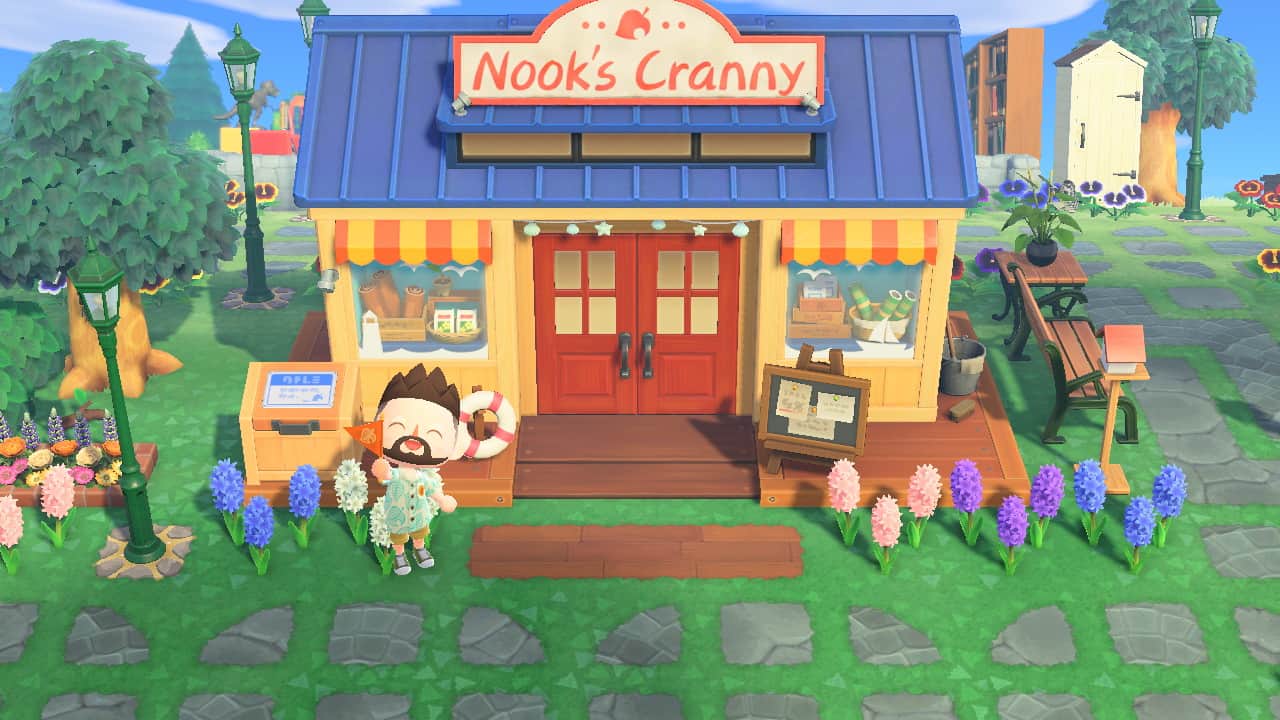
A staple of every Animal Crossing game is Nook’s Cranny. A daily rotation of items and willingness to buy nearly everything ensures visiting the shop is always on the to-do list.
Nook’s Cranny is open from 8 AM to 10 PM.
Features
- Daily items
- Seasonal items
- Selling items
- Drop-off box
- Checking turnip prices
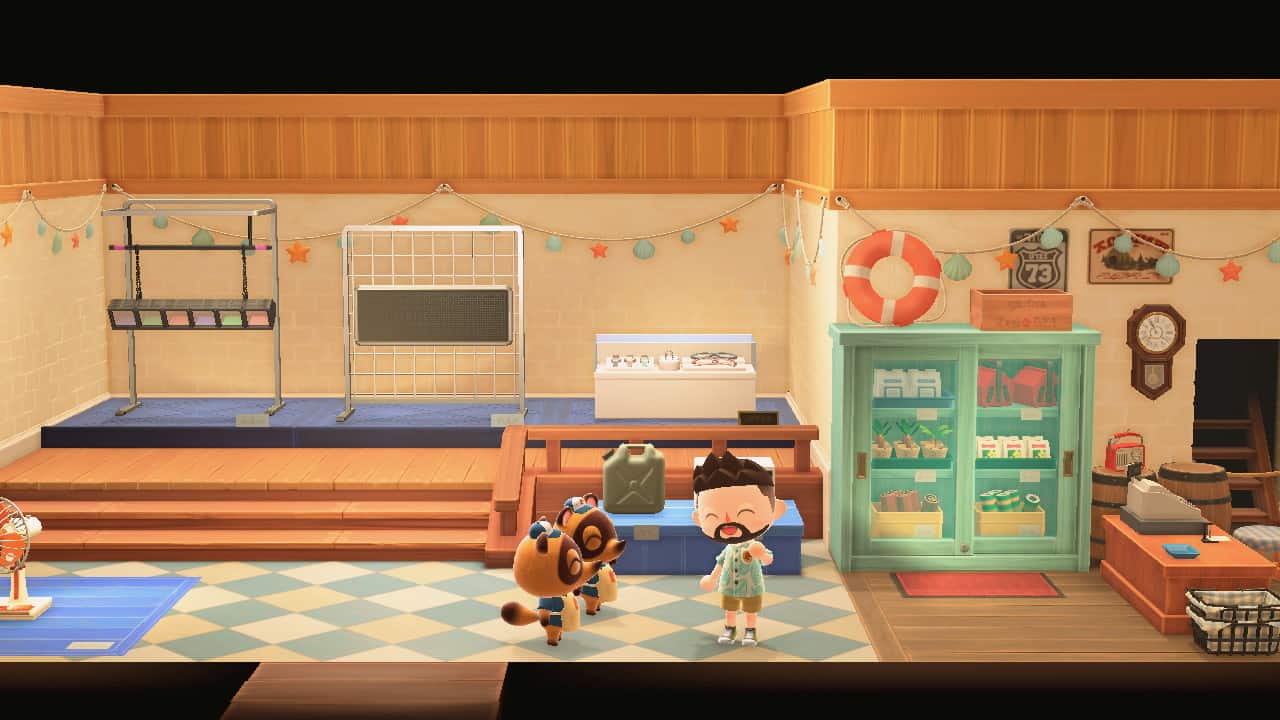
Nook’s Cranny is the first shop you’ll build on your island. After paying off your Deserted Island Getaway package debt and upgrading your tent to a house, you’ll find Tom Nook and Timmy talking is Resident Services about building a shop. Tom Nook will request that you gather materials: 30 wood, 30 hardwood, 30 softwood, and 30 iron nuggets. After collecting the supplies and delivering them to Tom Nook, he’ll give you a building kit to decide where the shop will go. The next day it’ll be ready to go.
There are two stages to the shop. The first looks like a small shack with four items on display. Two of the items will be larger, and you can only buy them once, though they will be in your catalog so that you can purchase them through Nook Shopping. The other two items will be smaller, and you can buy multiple of them. In addition, there is a cabinet where you can purchase non-furniture items in the back corner.
Three requirements need to be met for Nook’s Cranny to upgrade. The first two are fairly simple, and you’ll stumble into them if you are playing regularly. First, Mabel needs to have visited your island. You won’t need to worry about this because Mabel starts visiting your island once you build Nook’s Cranny. Second, you need to collectively buy or sell 200,000 bells worth of goods. This may initially seem like a lot, but it adds up fairly quickly when you’re buying furniture and trying to pay off your loans. The last requirement is the one that usually triggers the upgrade, and that’s having Nook’s Cranny open for thirty days.
Once all these requirements are met, Nook’s Cranny will close for one day to renovate, then will open as a larger shop. The new shop has everything the old shop had and more. There’s now a third larger item much more expensive than the other two and a spot that occasionally features seasonal items. Also, the cabinet has more tools, wallpaper, and flooring options.
There are two spots outside of Nook’s Cranny you can interact with. One is the drop-off box. This box allows you to deposit goods at any time to be sold at a lower price. The next day you’ll get a call from Timmy telling you that your bells have been deposited in your bank account. The other item you can see is a bulletin board that tells you the hot items for the day. Hot items are craftable goods that will be bought for double that day; it’s a good way to make easy money if you have the materials.
Able Sister’s Shop
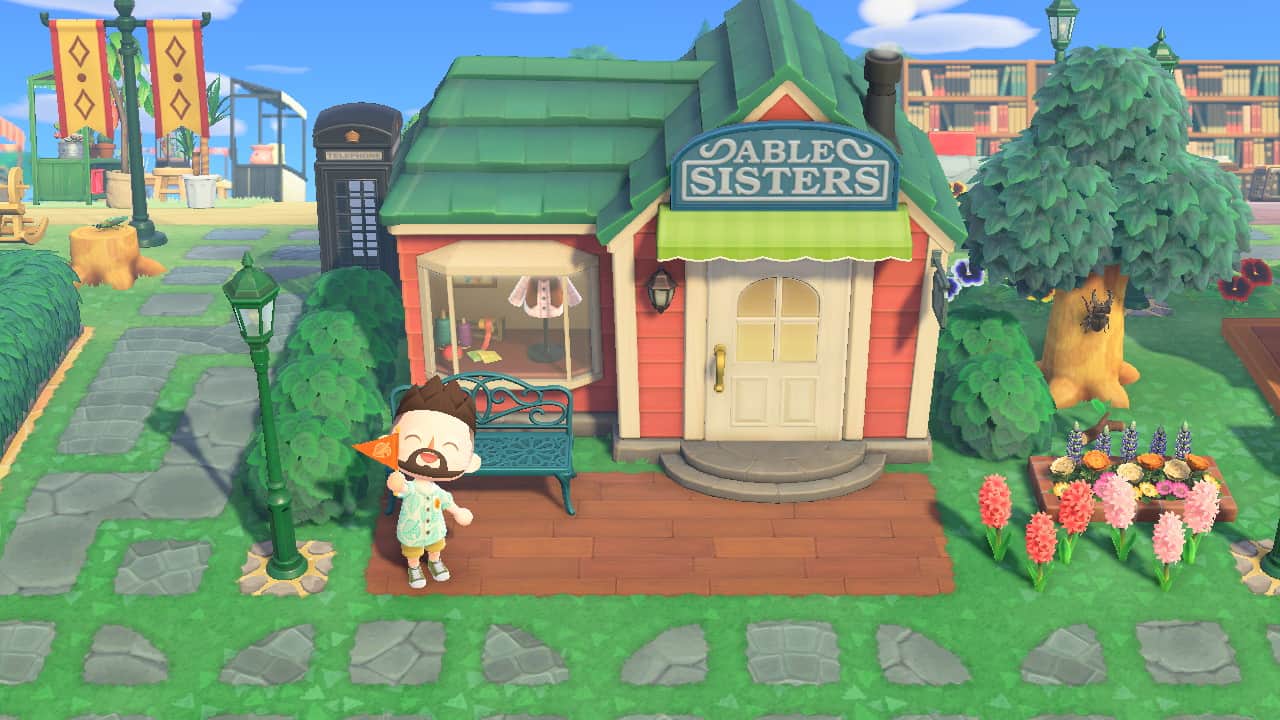
Decorating your island may be the main focus of the game but decorating your character is just as important. Running around an island you made for yourself isn’t as fun if you are running around as a character you don’t feel attached to. Thanks to the hard work of the hedgehog sisters, Mable and Sable, there are hundreds of ways to style your character. You can dress as you would in real life, in grand costume, or in the goofiest get-up you can get your hands on.
The Able Sister’s Shop is open from 9 AM to 9 PM.
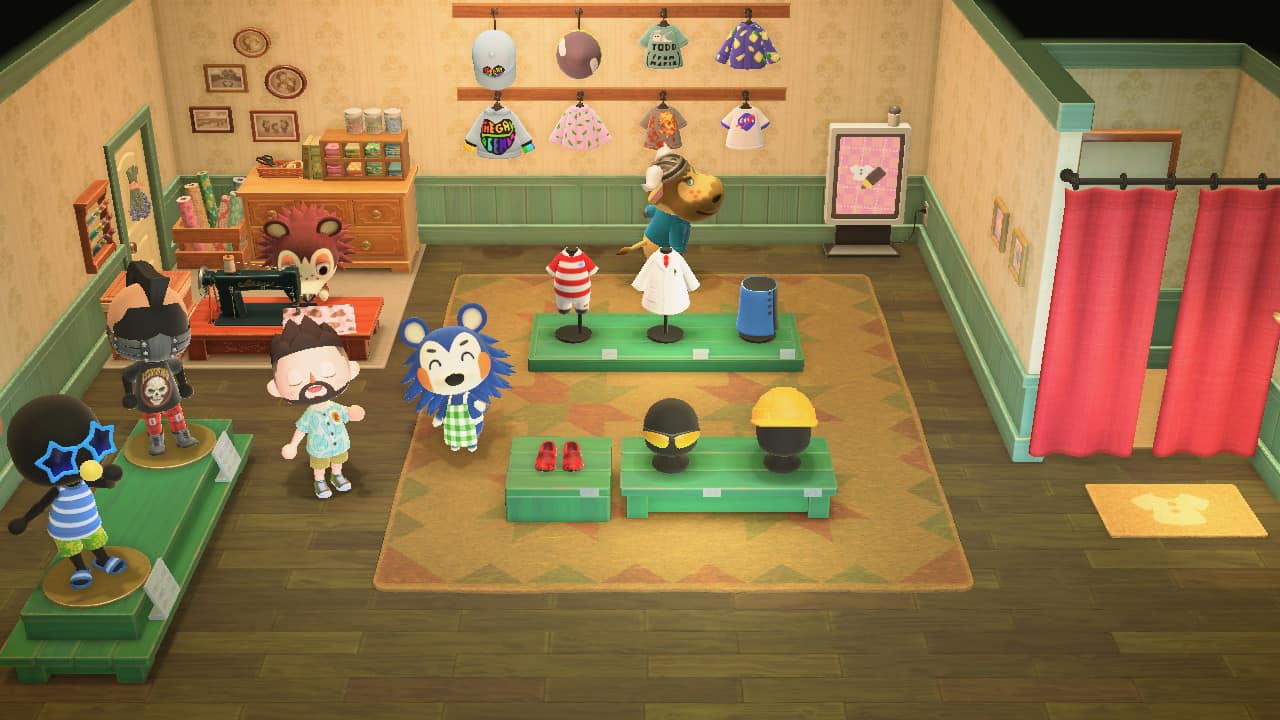
Features
- Daily clothing
- Weekly clothing
- Fitting room
- Custom Designs Portal
- Custom Designs display
- Sable’s patterns
After building Nook’s Cranny, Mabel will start to visit the plaza in front of Resident Services with a small selection of clothes to buy. After Mabel has visited at least twice, you’ve bought at least 5 items from her, and you’ve spent at least 5,000 bells, Mabel will want to build a shop on your island. Like Nook’s Cranny, you’ll be given a construction kit to choose where the shop will go, and after a day of construction, it’ll be open.
The shop will have a wide variety of clothing and accessories. Most of it will change daily, but two outfits, shown on mannequins, will be available for the whole week. Items are displayed in the shop and in the window and can be bought there, but by using the fitting room, you can try the clothes on first, buy multiple items at once, and have access to every color of the items being sold.
There’s clothing hung on the back wall that isn’t being sold. These are custom designs that you can change around or add to your design slots. If you add your own designs to the wall, your villagers will sometimes wear them. Next to the custom design display is a portal that allows you to access the internet to share your custom designs and see the designs others have made.
Sable is always sewing in the back of the shop. At first, she doesn’t want to talk and only focuses on her work. But, if you keep talking to her, she’ll grow to like you and start giving you patterns you can use when customizing your furniture. Of course, you won’t get anything from talking to her after she’s given you all her patterns. However, I still like to because she expresses her appreciation for you and her love for her sisters.
Campsite
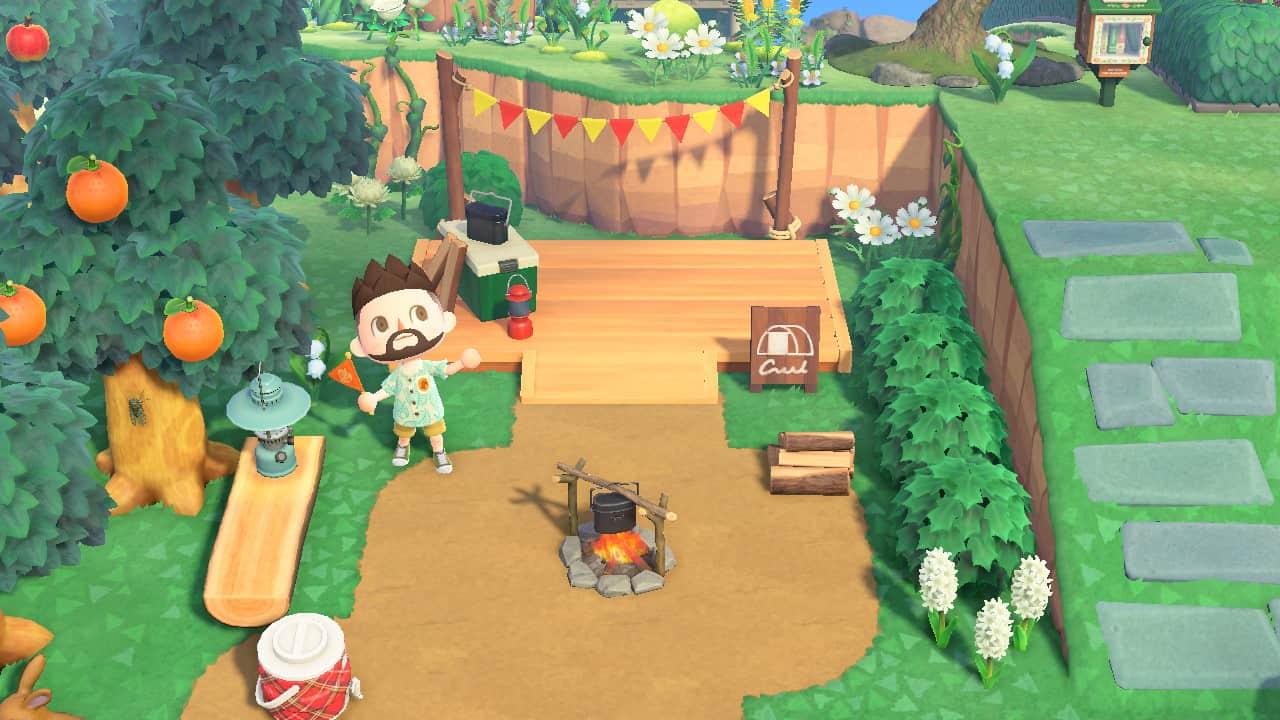
You don’t have much control over villagers moving in and out of your island. You can hunt on Nook Miles Islands for a villager you want, but a villager has to move out first for that to happen. Campsite villagers allow you to be a little more forceful with the move-out process.
Features
- Random Campers
- Amiibo Campers
- Villager games
Once five villagers live on your island and you’ve upgraded your Resident Services building, Tom Nook will suggest building a campsite and give you a construction kit. To construct the campsite, you’ll need 15 wood, 15 hardwood, 15 softwood, and 15 iron nuggets. After a day of construction, your campsite will be open.
You are required to invite the first camper to move in. If you don’t, the game progress will stop, and the villager will stay at the campsite every day until you invite them to move in.
After that, the campsite will be empty most of the time, but sometimes Isabelle will announce a visitor at the campsite, and a tent will appear on the wooden platform. You can talk to this villager and play games to win items. The games are always card games where you guess either the suit or color of the card.
Sometimes when talking to the visitor, they will express interest in moving to your island. If you invite them, they will refuse, accept, or offer to play a game and move in if you win. If they refuse or you lose the game, you still have a chance to get them to move in. You just need to keep talking to them until they agree to move in, or you win the game.
If you have less than ten villagers on your island, the camper will move into an empty lot. If you have ten, the visitor will suggest asking another villager to move out. You can either agree, and the selected villager will move out, or disagree, and the visitor won’t move in. Unfortunately, the villager chosen to move out won’t change if you ask the visitor to move in again, however you can keep resetting the game to repeat the process to hopefully get another villager chosen.
If you invite an amiibo camper, then they’ll visit the campsite and request that you build them furniture. They will agree to move in if you do this for three days. If you have ten villagers when an amiibo camper decides to move in, you can choose which villager moves out. This is the only way to get a specific villager to move out without just waiting.
The Museum
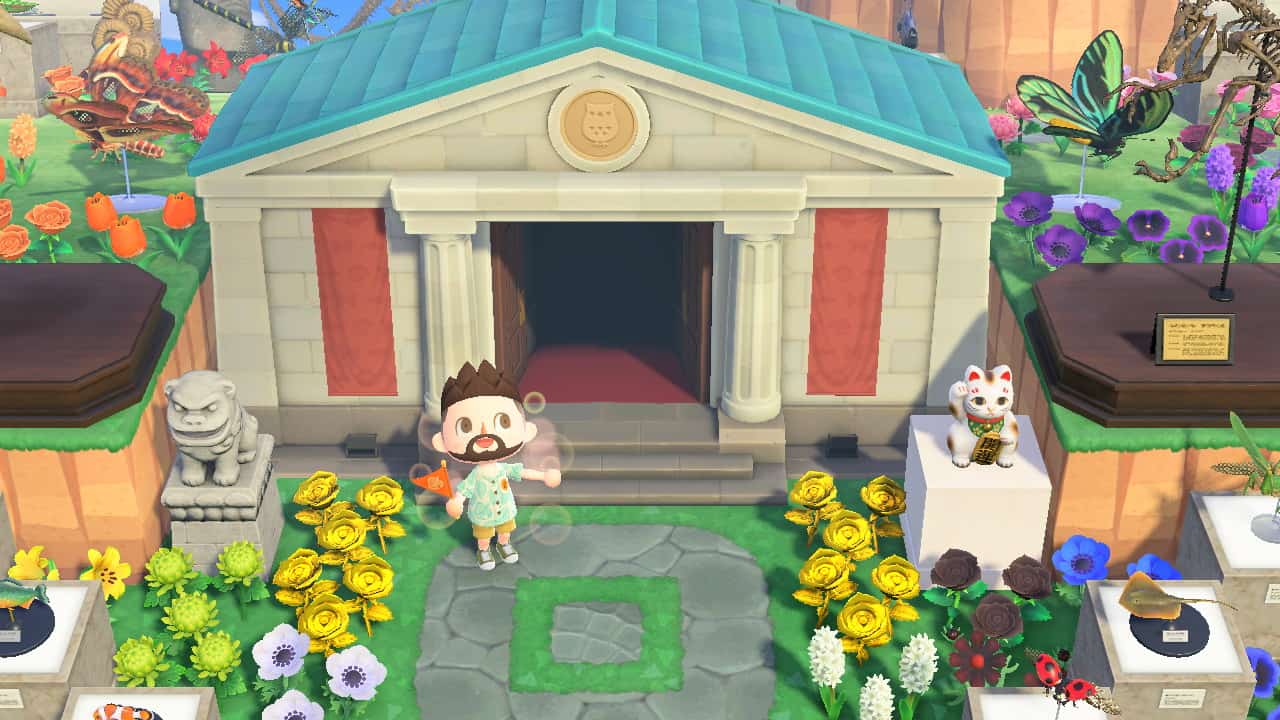
I’m a sucker for any game that has a museum. My number one rule when playing any Animal Crossing game is that the first time I find a new fish, bug, fossil, or art piece, it goes directly to Blathers. There’s something so satisfying about seeing the beautiful rooms gradually fill up as I progress.
Features
- Collection displays
- Fossil Assessment
- The Roost
- Buying Posters
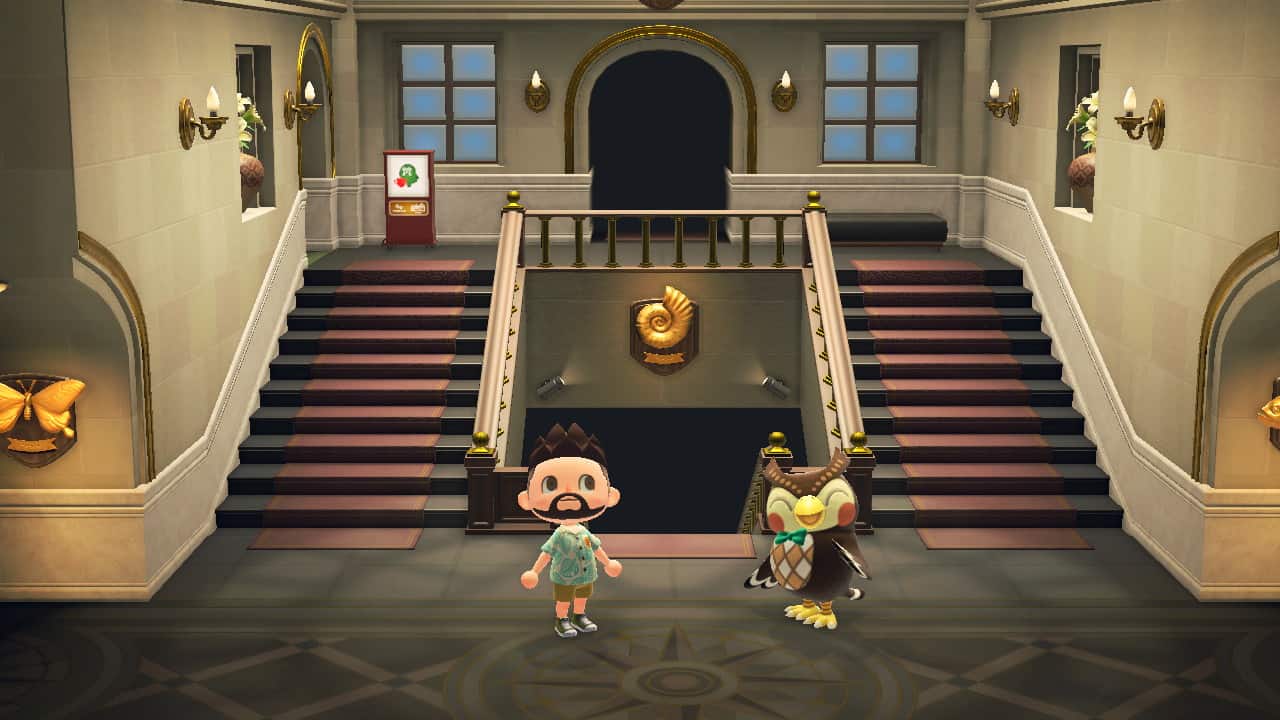
Along with Nook’s Cranny, the museum is one of the first buildings you unlock. After donating five fish or bugs to Tom Nook, he’ll invite Blathers to the island, and you’ll choose a spot for his tent. Then, after donating another fifteen fish or bugs to Blathers, he’ll suggest building the museum. You’ll then have access to the museum’s three wings: bug rooms, fish rooms, and fossil rooms. Blathers will also be available to assess your fossils, accept donations, and sell posters for any completed collections.
After sixty donations, Blathers will express interest in adding an art wing. After that, Redd will appear, and you can start inspecting his wares to find genuine pieces to add to your collection. After donating the art you buy from Redd, the museum will go under construction. The upgraded museum will become more colorful on the outside and add an art wing.
The Roost
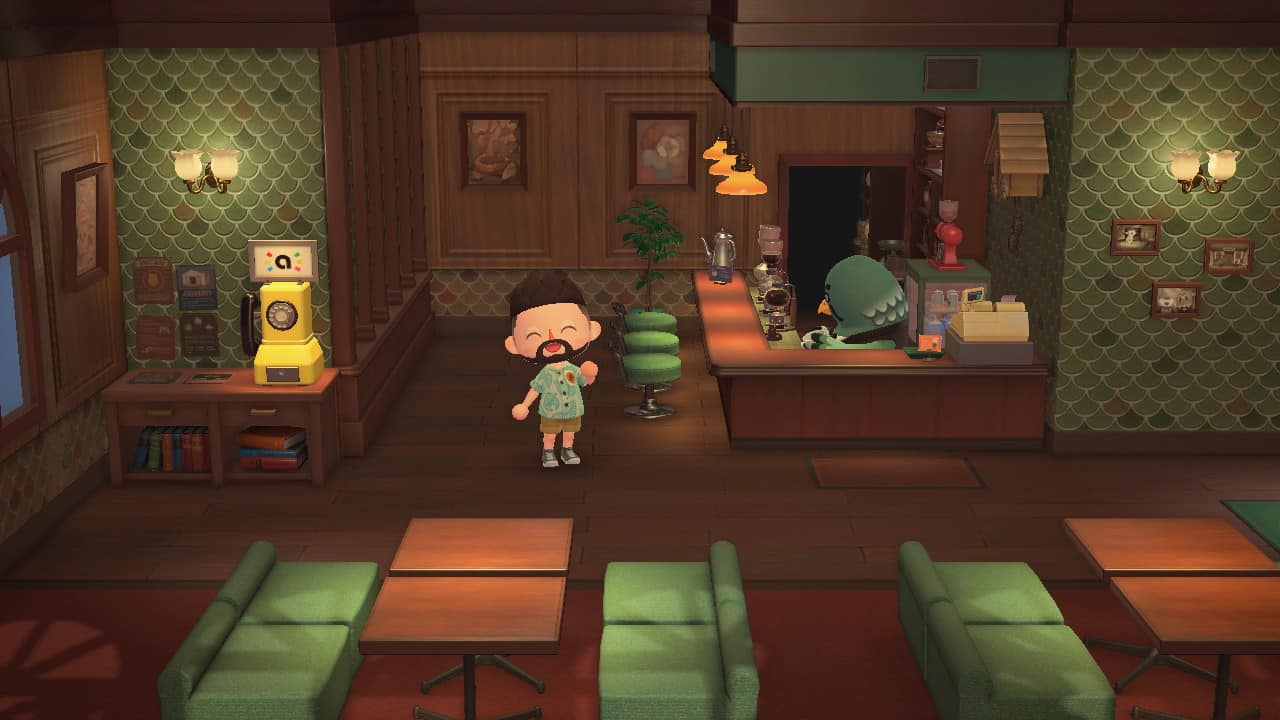
While not an unlockable building on its own, The Roost is an unlocked location in the museum, so I’m categorizing it as such. The lovely cafe offers a chill spot to hang with some of your favorite characters while enjoying a nice cup of coffee.
Features
- Coffee
- Invite amiibo friends for coffee
Once you’ve unlocked Kapp’n’s Boat Tours, Blathers will mention his old friend Brewster. You’ll then find Brewster wandering on a boat tour island, looking for gyroids. After talking to him, you’ll convince him to move to your island and open a cafe.
Once The Roost is open, you can sit and order coffee. Sometimes you’ll encounter villagers and other characters there, enjoying a cup of coffee or ordering some to go. Visiting the Roost and ordering coffee will make Brewster like you, and he’ll give you rewards based on how much coffee you’ve drunk.
There’s an amiibo spot in The Roost where you can scan your amiibo to invite the character to join you for coffee. Any card will work, and non-villager characters will have special dialogue, talking about their lives and stories.
Harv’s Island

After finding Harv wandering around your island, you’ll unlock the option to visit his island at the airport. His island is a small, natural place with an open area for an artists collective and a cabin. It’s gorgeous, and I’m a little jealous of the birds he always has hanging around.
Features
- Photopia
- ABD
- Katarina’s Fortune Telling
- Redd’s Shop
- Kick’s Shop
- Leif’s Shop
- Saharah’s Shop
- Harriet’s Salon
- Re-tail
- Tortimer’s Storage Access
The first part of Harv’s Island is Photopia. It’s a cabin with six rooms you can decorate to experiment with new room designs or take pictures. You’re able to invite your villagers and amiibo characters into Photopia. If you take a picture of these characters, then you’ll be able to buy their poster from Nook Shopping.
The second part of Harv’s Island is the clearing behind the cabin that hosts the artist’s collective. Here, you’ll be able to find some characters who visit your island and some who only appear here. The ones that visit your island will be selling the same wares they would on your island, changing the times weekly. The other characters will be offering unique services, like customization and fortune-telling.
You can unlock the different shops by donating bells to the gyroids around the clearing. Once you pay enough bells, the character will move into the commune, where they will be unless they are visiting your island.
Conclusion
There are plenty of places to go and plenty of things to see in Animal Crossing. It takes some time to unlock them all, but that’s the game’s beauty. You get to work on things little by little at your own pace. You don’t need to do everything at maximum efficiency to have fun, but if grinding and speed are what you enjoy, you can see how fast you can get to the finish line. Personally, I’ve had a blast getting to all these places one by one.
FAQs
Question: What Stores do you get in Animal Crossing?
Answer: You get two stores on your island, Nook’s Cranny and the Able Sisters. There are other merchants to buy wares from, but the closest thing they have to stores are trailers in Harv’s commune.
Question: What Places are There in Animal Crossing?
Answer: In a quick run down, here are the places you can go in Animal Crossing. On your island, there are Resident Services, Nook’s Cranny, Able Sisters, the Museum, the pier, the secret beach, and the airport. On Harv’s Island there’s Photopia and the artist’s collective. Then there are lots of mystery islands you can visit by boat or seaplane.
Question: What is the Point of Harv’s Island?
Answer: Before the 2.0 update, the point of Harv’s Island was just to use Photopia as a sandbox play area to decorate and take pictures in. Now it also houses a place for wandering merchants and other characters to stay and sell their goods and services.
Question: How Many Islands are in Animal Crossing?
Answer: If we only count the islands in a single game of Animal Crossing, there are about 30 different islands. There’s your island, Harv’s island, the May Day island, and about 25 possible islands from mystery tours. It’s hard to know exactly how many because patches sometimes add or remove mystery islands.
- Rodney Animal Crossing Guide - January 26, 2023
- Rarest Fish in Animal Crossing - January 1, 2023
- Squirrels Animal Crossing Guide - December 27, 2022