Welcome to your Deserted Island Getaway Package by Nook Inc.! In Animal Crossing: New Horizons, you get to enjoy your indefinite vacation from city life by living in an island paradise. You can dive in the blue waters, run across the hot sand, and even cook up a delicious meal for yourself and your friends. It sounds exciting, right? But if you want to live on an uncharted island, you need to build it from scratch.
You can buy furniture, clothes, and a ton more stuff using Bells, the currency in Animal Crossing. However, at the start of the game, you do not have that many Bells on you! Do not worry because you can craft your furniture using the resources you can find on your island. Crafting is an essential element in this game because you need to craft your tools (at least initially) to do anything on your island.
If you want to make your island lively by placing decorations but you do not have the Bells for them, you can craft similar alternatives. You can even craft clothes to spice up your wardrobe! Crafting is not a complicated system, but for people who are new to Animal Crossing or video games in general, this guide about crafting will help you understand the ins and outs.
Bottom Line Up Front: What is Crafting in Animal Crossing: New Horizons?
Crafting in Animal Crossing: New Horizons is a mechanic that lets you make tools, furniture, clothes, and more using resources you can find on your island or even other items you can craft. If you want to craft something, you need these three essentials: DIY workbench, DIY recipe, and DIY recipe’s ingredients. DIY crafting recipes in this game come in ten different types:
- Tools (examples: Axe, Shovel, Fishing Rod)
- Housewares (examples: Barrel, Rocking Chair, Log Stool)
- Miscellaneous (examples: Wooden Music Box, Pot, Fruit Basket)
- Wall-mounted (examples: Key Holder, Iron Doorplate, Potted Ivy)
- Ceiling décor (examples: Vine Garland, Hanging Glowing Moss, Festival-Lantern Set)
- Wallpapers, floors, and rugs (examples: Cabin Wall, Lunar Surface, Orange Rug)
- Equipment (examples: Recycled Boots, Leaf Umbrella, Woven-Vine Pochette)
- Other (examples: Medicine, Fish Bait, Lattice Fence)
Cooking recipes also count as DIY crafting recipes, although you need to use kitchen-type furniture instead of a workbench. Fans separate the cooking categories into two: sweet and savory. As the names suggest, sweets are anything sugary, like candy, cookies, and jelly, while savory food is the main dish, like a salmon sandwich, pumpkin soup, and bread. I love that Nintendo finally gave us the option to cook!
Some of these DIY recipes are seasonal, i.e., the items follow the theme of a season (spring, summer, fall, or winter) or by events (e.g., Bunny Day and Halloween). You can sort the recipes alphabetically, by the order you obtained the recipe, or by series. I think sorting by series is the best option because viewing these recipes in related groups and themes is clean.
How to Craft in Animal Crossing: New Horizons
To craft, you need to have the DIY recipe of the item you want to craft, the ingredients required to make the item, and a workbench. Below is a simple step-by-step process to get you started on crafting something. You can look up more details in the sections I have written down if you get confused about a certain step.
- Obtain the DIY recipe and learn it.
- View the DIY recipe’s ingredients via your phone.
- Collect the DIY recipe’s ingredients.
- Use a workbench to open the crafting UI.
- Find the DIY recipe and select “Craft it!”
How to Learn DIY Crafting Recipes in Animal Crossing: New Horizons
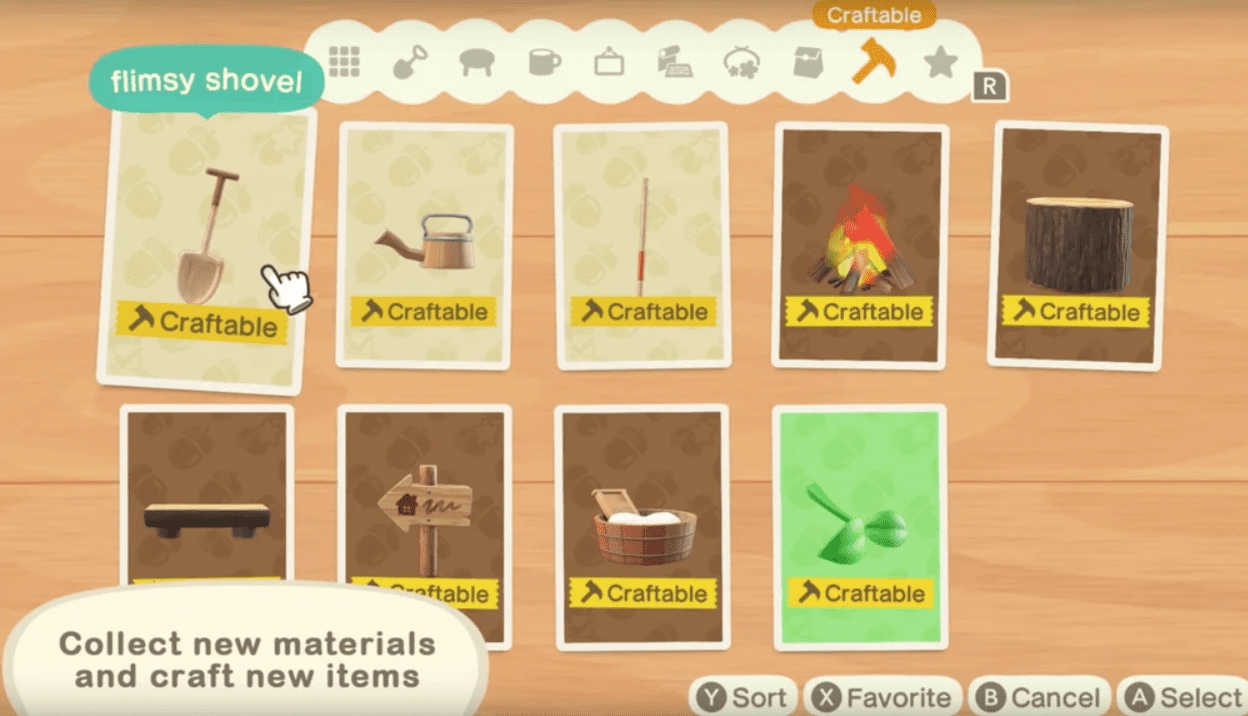
Firstly, you need to get a DIY recipe and learn it. You can get them in bottles that drift to your island’s shores or through talking to villagers while they are crafting something. Personally, I like talking with my villagers to know more about them.
Once you get a DIY recipe, open your inventory and select it. A pop-up will display that reads “Learn.” You simply have to click on it. After that, you can approach any workbench, and the option to craft the item of the DIY recipe you learned will appear. I wish learning something new would be that easy; I would be a master of multiple languages in a single day!
How to View DIY Recipe Ingredients in Animal Crossing: New Horizons
To view the ingredients of every DIY recipe you have; you need to open up your phone. Then, select the “DIY Recipes” app. If you do not have this app, you need to follow the story, i.e., follow Tom Nook’s commands, until you get it. From this app, you can look into each DIY recipe. Highlighting one shows the following details: its ingredients, size, and how many you have in your pocket and storage.
You can also tag DIY recipes as your favorite by pressing “X” when highlighting them. You can view all your favorite DIY recipes in the “Favorites” tab. It is a helpful feature when you want to craft a pool of items, and you want to view them quickly and easily. For example, I worked on a maze once involving stools, so I favored the DIY recipes of the items required for the maze.
How to Collect DIY Crafting Ingredients in Animal Crossing: New Horizons
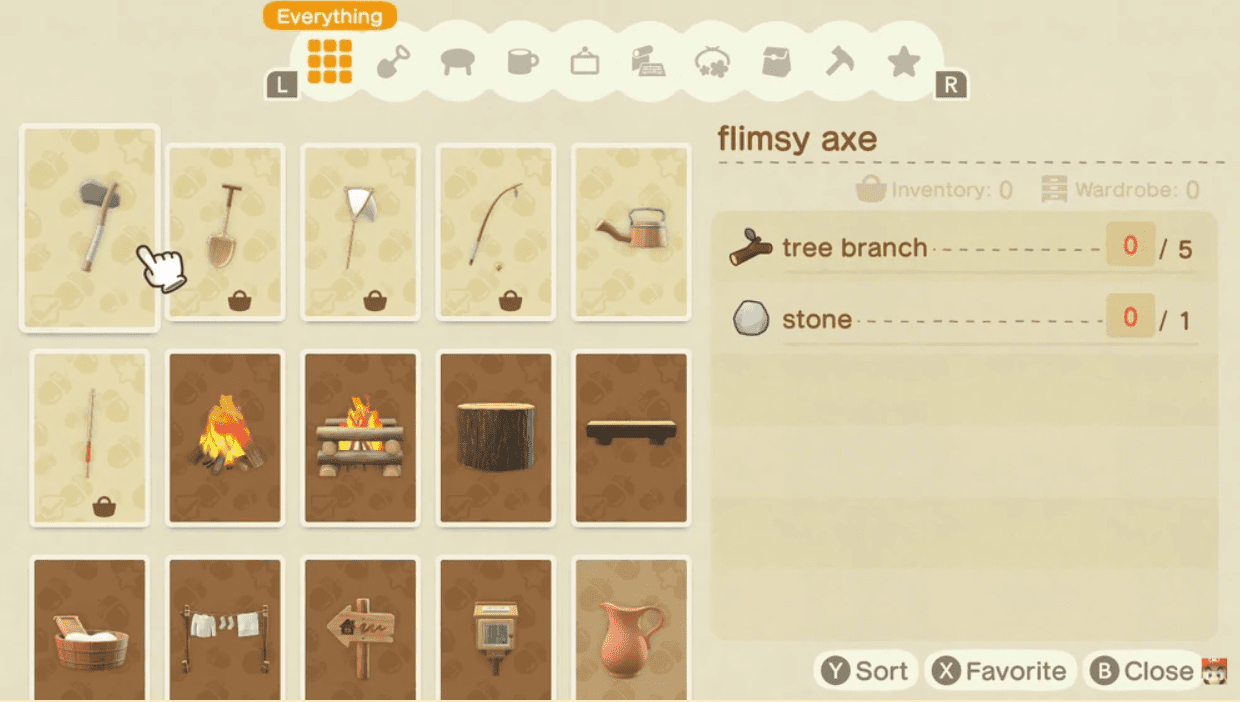
DIY crafting ingredients are obtainable items you can get by buying, making, or harvesting them from your island. You sometimes need to make one thing to make something else (sort of like in Inception). For example, you need to make a flimsy shovel to make a shovel. Most DIY recipes that require items you need to craft are tools, but there are exceptions.
Some DIY recipes require you to buy the ingredient instead of making or harvesting them. For example, you need to buy a cardboard box at Nook’s Cranny to make cardboard-based furniture like a cardboard bed, cardboard chair, etc.
The most common type of ingredients, however, are harvestable ones like wood, stone, clay, etc. To gather wood, you need an axe. Then, chop down a tree using your axe, and wood will fall. Wood may come in three different types: wood, softwood, and hardwood.
To get stone, clay, iron nuggets, and gold nuggets, you need an axe or a shovel. You then hit a stone located on your island using the tool. Do not eat something before doing so; if your belly is full, you can break the stone with one hit. If you want to relocate your stones, you can break them, but if they are in a suitable place already, watch out. Do not make the same mistake as me!
Bamboo pieces come from hitting a bamboo thicket using an axe, similar to how wood comes from hitting a tree. Wasp nests occasionally fall down from trees when you shake them and be careful with the wasps; their sting will make your face bumpier than the roads in my neighborhood. You can dig up manila clams on the island’s sandy beaches. You can also pick up different kinds of seashells there.
Some harvestable resources depend on the season or event. Below is a table containing the seasonal materials, the date you can find them in the Northern and Southern Hemispheres, and the method to obtain them.
| Material | Method of obtaining | Northern Hemisphere | Southern Hemisphere |
| Young Spring Bamboo | Hitting a bamboo thicket using an axe | February 25 to May 31 | August 25 to November 30 |
| Cherry-Blossom Petal | Catching one in the air using a net | April 1 to April 10 | October 1 to October 10 |
| Summer Shell | Picking one from the island beach | June 1 to August 31 | December 1 to February 28 |
| Acorn | Shaking a tree | September 1 to December 10 | March 1 to June 10 |
| Pine Cone | Shaking a cedar tree | September 1 to December 10 | March 1 to June 10 |
| Mushrooms (Elegant, Flat, Rare, Round, and Skinny) | Picking one near trees | November 1 to November 30 | May 1 to May 31 |
| Maple Leaf | Catching one in the air using a net | November 16 to November 25 | May 16 to May 25 |
| Snowflake | Catching one in the air using a net | December 11 to February 24 | June 11 to August 24 |
| Large Snowflake | Receiving one from a perfect snowman | December 11 to February 24 | June 11 to August 24 |
| Ornaments (Red, Blue, and Gold) | Shaking a decorated cedar tree | December 15 to January 6 | December 15 to January 6 |
| Earth Egg | Digging one up using a shovel | Around Easter | |
| Stone Egg | Hitting a rock using an axe or shovel | ||
| Leaf Egg | Shaking a tree | ||
| Wood Egg | Hitting a tree using an axe | ||
| Sky Egg | Shooting down balloons using a slingshot | ||
| Water Egg | Fishing using a fishing rod |
How to Use a DIY Crafting Workbench in Animal Crossing: New Horizons
To use a workbench, you first need to make one. There are five types of workbenches; you can craft four of them and buy the remaining one. The workbenches are:
- Cute DIY Table: Buy at upgraded Nook’s Cranny for 7000 Bells
- Mini DIY Workbench: Craft using wood (x3), Hardwood (x3), Softwood (x3), and (x2) Iron Nugget
- Simple DIY Workbench: Craft using Hardwood (x5) and Iron Nugget (x1)
- DIY Workbench: Craft using wood (x5), Hardwood (x5), Softwood (x5), Iron Nugget (x3), and Mini DIY Workbench (x1)
- Ironwood DIY Workbench: Craft using wood (x12), Iron Nugget (x6), and Mini DIY Workbench (x1)
Alternatively, you can use the workbench inside the Resident Services Building (or tent if you are still early in the game). I’m surprised that people forget about the workbench in the Resident Services Building. It is in front of Tom Nook! There is even an orange icon with the DIY Recipes app image on it.
Once you have access to a workbench, you simply need to go to it and press “A.” This will make you interact with it, which will open the crafting UI. From there, you can make anything your heart desires.
How to Get DIY Crafting Recipes in Animal Crossing: New Horizons
There are multiple ways to get DIY crafting recipes in Animal Crossing: New Horizons such as:
- Opening message bottles on the beach
- Buying DIY recipes from Nook’s Cranny
- Redeeming Nook Miles by using the Nook Stop
- Speaking to villagers who are crafting in their house
- Talking to or accomplishing tasks for special NPCs
- Opening gifts from popping balloons using a slingshot
- Receiving letters from the mail
- Learning them automatically after a special encounter
As for food, you can get random cooking recipes by talking to the chef in Happy Home Paradise’s restaurant. You can also get cooking recipes by buying packs of them in Nook’s Cranny, redeeming Nook Miles via the Nook Stop, or talking to a villager in their home while they are cooking.
Opening Message Bottles for DIY Crafting Recipes
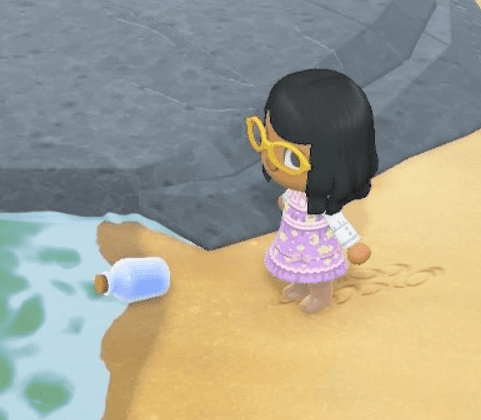
When you walk on the island’s beach, you will occasionally see bottles washed up on the shores with messages in them. Pick them up, go to your inventory, and open the bottle; you will find a letter and a DIY recipe! The letter comes in different styles, and they come from different people. Occasionally, some of these DIY recipes correspond to an event day and come from special NPCs like Zipper during Bunny Day.
The real question is: who are these people throwing DIY recipes into the ocean? Do they have nothing better to do? Why are there so many people with this much free time in their lives? I need answers, Nintendo!
Buying DIY Crafting Recipes From Nook’s Cranny
You can buy several DIY recipes and recipe packs in Nook’s Cranny for varying prices. Most of the recipes for tools cost 280 Bells. Below is a list of them that you can buy straight from the shelf, along with their individual prices. Included in this list are the packs and cooking recipes.
- Flimsy axe (tool) recipe: 280 Bells
- Flimsy shovel (tool) recipe: 280 Bells
- Flimsy Fishing Rod (tool) recipe: 280 Bells
- Flimsy Net (tool) recipe: 280 Bells
- Flimsy Watering Can (tool) recipe: 280 Bells
- Slingshot (tool) recipe: 300 Bells
- Vaulting Pole (tool) recipe: 500 Bells
- Wooden Ladder Set-up Kit (tool) recipe: 2000 Bells
- Pitfall Seeds (item) recipe: 900 Bells
- DIY for Beginners (pack): 2680 Bells; includes recipes for:
- Frying Pan
- Hay Bed
- Ocarina
- Old-Fashioned Washtub
- Stone Stool
- Wooden-Block Toy
- Test Your DIY Skills (pack): 2680 Bells; includes recipes for:
- Mini DIY Workbench
- Potted Ivy
- Ring Toss
- Rocking Chair
- Swinging Bench
- Wooden-Block Bookshelf
- Wooden-Block Chair
- Wooden-Block Stereo
- Wildest Dreams DIY (pack): 6980 Bells; includes recipes for:
- Brick Oven
- Hearth
- Iron Wall Lamp
- Ironwood Kitchenette
- Plain Sink
- Wooden Fish
- Basic Cooking Recipes (cooking pack): 4980 Bells; includes recipes for:
- Whole-Wheat Flour
- Brown Sugar
- Seaweed Soup
- Organic Bread
- Gnocchi di Patate
- Tomato Puree
- Brown-Sugar Cupcakes
- Carrot Cake
- Turkey Day Recipes (cooking pack) 9800 Bells; includes recipes for:
- Clam Chowder
- Pumpkin Pie
- Gratin
- Olive-Flounder Meunière
Redeeming Nook Miles Via the Nook Stop for DIY Crafting Recipes
Nook Miles is a type of currency in the game that you can generate by accomplishing certain activities and tasks. In the beginning, you pay your move-in fees and your tent through Nook Miles. You can access all the different goals to earn Nook Miles by looking at your phone and opening the Nook Miles+ app.
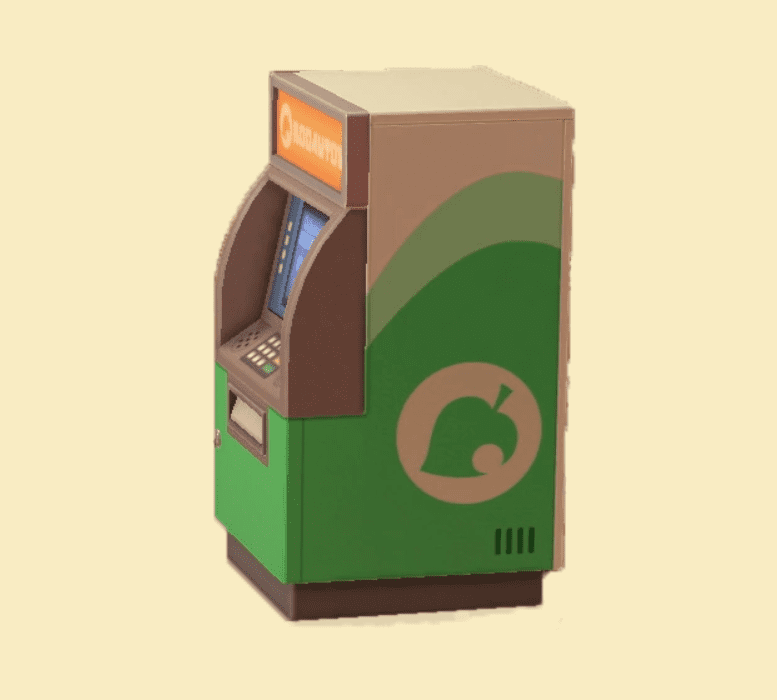
Anyway, you can use the Nook Miles you have earned by spending them through the Nook Stop to get various items. You can find the Nook Stop in the Resident Services Building; it looks like a green ATM machine. Interacting with the Nook Stop gives you three options: Redeem Nook Miles, access Nook Shopping, or access the ABD.
There are a lot of recipes you can get by redeeming your Nook Miles. All the recipes for fences cost 1000 Nook Miles, but the recipes for furniture vary in cost. Below is a list of them, plus packs of recipes (cooking included).
Fence Recipes: 1000 Nook Miles Each
- Bamboo Lattice Fence
- Bamboo-Slats Fence
- Barbed-Wire Fence
- Block Fence
- Corral Fence
- Corrugated Iron Fence
- Country Fence
- Green Bamboo Fence
- Imperial Fence
- Iron Fence
- Iron-and-Stone Fence
- Lattice Fence
- Log Fence
- Log-Wall Fence
- Rope Fence
- Simple Wooden Fence
- Spiky Fence
- Stone Fence
- Straw Fence
- Vertical-Board Fence
- Zen Fence
Furniture Recipes
- Brick Well: 2000 Nook Miles
- Destination Signpost: 1500 Nook Miles
- Donation Box: 800 Nook Miles
- Drinking Fountain: 800 Nook Miles
- Fountain: 3000 Nook Miles
- Manhole Cover: 800 Nook Miles
- Outdoor Bath: 3000 Nook Miles
- Robot Hero: 5000 Nook Miles
- Silo: 3000 Nook Miles
- Simple Well: 2000 Nook Miles
- Stall: 2000 Nook Miles
- Stone Arch: 2000 Nook Miles
- Stone Tablet: 800 Nook Miles
- Wave Breaker: 1500 Nook Miles
- Wooden Storage Shed: 6000 Nook Miles
Be a Chef! DIY Recipes+ (Cooking Recipe Pack): 3000 Nook Miles; Includes Recipes For:
- Flour
- Sugar
- Carrot Potage
- Pumpkin Bagel Sandwich
- Tomato Curry
- Grilled Sea Bass with Herbs
- Pancakes
- Smoothie (the flavor depends on your island’s native fruit)
Pretty Good Tools Recipes (recipe pack): 3000 Nook Miles; Includes Recipes For:
- Axe
- Fishing Rod
- Net
- Shovel
- Stone Axe
- Watering Can
Custom Fencing in a Flash (recipe pack): 2500 Nook Miles; Includes Recipes For:
- Hedge
- Large Lattice Fence
- Park Fence
Speaking with Villagers For DIY Crafting Recipes
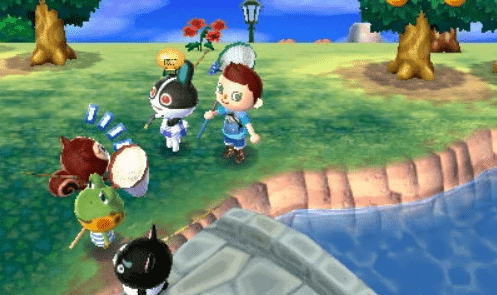
The only acceptable place to barge in another person’s house without prior notice is in Animal Crossing: New Horizons. When you enter a villager’s house, you can sometimes see them doing something on their workbench. Approach them and talk to them; they will mention that they are making an item.
They will then gladly share the DIY recipe with you, even if you have already learned the DIY recipe. The DIY recipe you will receive depends on the villager’s personality. Below is a list of some possible DIY recipes the villager may share with you depending on their personality. I cannot list all of them because there are too many, and I want to sacrifice your monitor’s space because I love my readers.
Lazy Villagers
| Orange Dress | Orange Umbrella | Bone Doorplate | Garden Rock | Log Wall-Mounted Clock |
| Mossy Garden Rock | Music Stand | Signpost | Orange Rug | Orange Wall |
Jock Villagers
| Log Pack | Pear Hat | Plain Wooden Shop Sign | Trophy Case | Doghouse |
| Firewood | Kettlebell | Beekeeper’s Hive | Jungle Wall | Honeycomb Flooring |
Cranky Villagers
| Armor Shoes | Bamboo Hat | Bonfire | Scarecrow | Pot |
| Bonsai Shelf | Gong | Deer Scare | Bamboo Wall | Dark Bamboo Rug |
Smug Villagers
| Gold Helmet | Straw Umbrella Hat | Wooden Low Table | Log Stakes | Decayed Tree |
| Tall Lantern | Ironwood Clock | Document Stack | Stone Wall | Basement Flooring |
Normal Villagers
| Traditional Straw Coat | Knitted-Grass Backpack | Log Decorative Shelves | Natural Garden Table | Cutting Board |
| Wooden Toolbox | Terrarium | Tiny Library | Woodland Wall | Peach Rug |
Peppy Villagers
| Leaf Mask | Green Grass Skirt | Wooden Full-Length Mirror | Log Stool | Wooden-Block Stool |
| Birdhouse | Paw-Print Doorplate | Hanging Terrarium | Manga-Library Wall | Shell Rug |
Snooty Villagers
| Wooden End Table | Butter Churn | Timber Doorplate | Classic Pitcher | Aroma Pot |
| Birdbath | Tall Garden Rock | Lucky Gold Cat | Modern Wall | Money Flooring |
Big Sister Villagers
| Leaf Umbrella | Apple Dress | Tree Branch Wreath | Wooden Waste Bin | Key Holder |
| Iron Garden Bench | Street Piano | Gear Tower | Brown Herringbone Wall | Apple Rug |
Any Villagers
| Chic Mum Crown | Spooky Lantern | Festive Tree | Fruit Salad | Jingle Wall |
| Festive Rug | Baked Potatoes | Orange Jelly | Plain Scones | Golden Ladder Set-Up Kit |
Interacting With Special NPCs for DIY Crafting Recipes
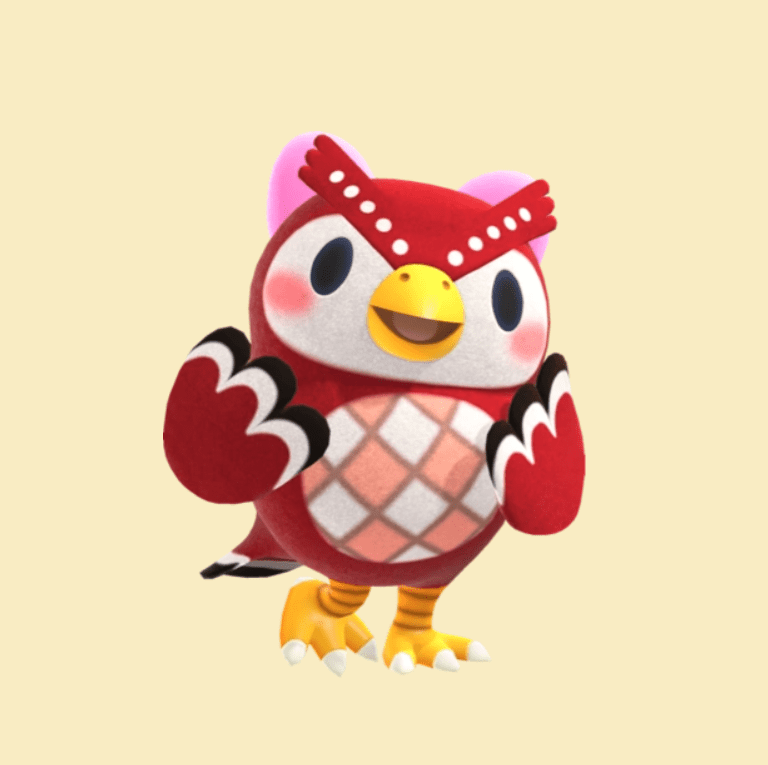
Some special NPCs will give you crafting recipes after talking with them or accomplishing tasks for them. Below is a list of these NPCs and some samples of the DIY recipes they can give. Again, I will not list all the possible DIY recipes because it will make the article too long!
Celeste: Talk to Her When She Visits Your Island
- Wand
- Satellite
- Space Shuttle
- Starry-Sky Wall
- Galaxy Flooring
- Star Pochette
- Zodiac set
Daisy Mae: Purchase Turnips From Her
- Bamboo-Shoot Soup
- Turnip Salad
- Kabu Ankake
- Jarred Bamboo Shoots
Jingle: Talk to Him During Toy Day
- Gift Pile
- Festive Wrapping Paper
Leif: Talk to Him When He Visits Your Island
- Hedge
- Veggie Basket
Niko: Donate Materials in His Material Box, Make the Eighth Vacation Home, and Attend His Seminar in School
- Partition Wall
- Wooden Pillar
- Brick Pillar
- Golden Pillar
- Low Brick Island Counter
- Low Concrete Island Counter
- Low Simple Island Counter
- Tall Steel Island Counter
- Tall Marble Island Counter
- Tall Golden Island Counter
Pascal: Give Him the Scallop You Find While Diving
- Mermaid set, including:
- Mermaid Lamp
- Mermaid Screen
- Mermaid Closet
- Mermaid Sofa
Snowboy: Talk to Him After Perfectly Building Him
- Frozen set
- Ice Wall
- Ice Flooring
- Snowperson Head
- Ice Wand
Tom Nook: Follow the Story
- Bridge Construction Kit
- Campsite Construction Kit
- Ladder
- Campfire
- Tiki Torch
- Clothesline
- Wooden Simple Bed
- Log Bench
- Wooden-Block Stereo
- Swinging Beach
Zipper: Talk to Him During Bunny Day
- Bunny Day Arch
- Wobbling Zipper Toy
- Bunny Day Wand
My favorite special NPC that I can get furniture from is Celeste. Firstly, she is adorable. Secondly, the items she gives are magnificent. I made a Crescent-Moon Chair thanks to her giving me the DIY recipe for it, and I put it in my room. It looks super elegant!
Popping Balloons Using a Slingshot for DIY Crafting Recipes
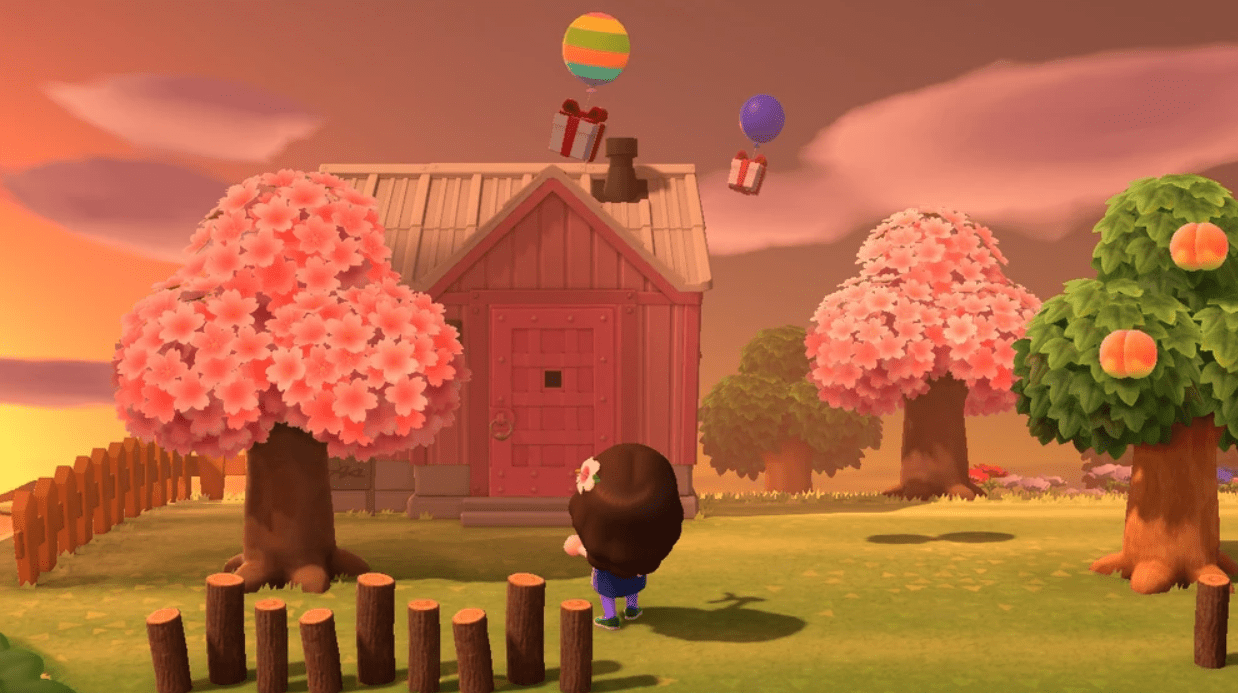
Every time you go outside, you may occasionally see balloons floating by with a gift box tied to them. It’s safe to pop them using your slingshot, and the gift box will fall to the ground when you do. What’s inside the gift box, though, are various items, and some of them may be DIY recipes.
Getting a DIY crafting recipe from the gift boxes attached to the balloons is often for making seasonal events like Halloween and Christmas. Some of them belong to a series like the Bamboo and Cherry Blossoms Series. Below is a list of DIY recipes that you can get from popping balloons. Once more, I am not listing everything.
- Golden Slingshot (appears after shooting 300 balloons)
- Pan Flute (appears during spring)
- Shamrock Wand (appears along the week of Shamrock Day)
- Cherry-Blossom Bonsai (appears during Cherry Blossom season)
- Tropical Vista (appears during summer)
- Red-Leaf Pile (appears during Maple Leaf season)
- Acorn Rug (appears during fall)
- Forest Flooring (appears during the Mushroom season)
- Frozen Fence (appears during winter)
- Big Festive Tree (appears during Festive season)
Receiving DIY Crafting Recipes from Letters in the Mail
Sometimes, the villagers notice that you have not been playing Animal Crossing for over six months now because you have been busy with life and work. They know that you do not have time for the Nintendo Switch now that you are trying to become a functioning adult. So, they spare you the worry of catching them when they are crafting. Instead, they give out letters with DIY recipes in them.
The kind of DIY recipes still correspond with their personality type; refer to my “Speaking with villagers for DIY crafting recipes” section to know more.
Learning DIY Crafting Recipes Automatically from Special Encounters
Have you ever wondered if your character has brains of their own? After all, every pun they make must fry their brains to a certain degree. Well, Nintendo has answered your questions! After special circumstances, your character may think of an idea on how to use an item. Thus, you automatically learn the recipe. Below is a list of sample DIY recipes alongside their required encounter.
- Recycled-Can Thumb Piano (unlocked after fishing up three Empty Cans)
- Succulent Plant (unlocked after fishing up an Empty Can)
- Tire Toy (unlocked after fishing up an Old Tire)
- Trash Bags (unlocked after fishing up 15 Trash)
- Garbage-Heap Wall (unlocked after fishing up all types of Trash)
- Recycled Boots (unlocked after fishing up two Boots)
- Poke (unlocked after fishing up a Salmon)
- Squid-Ink Spaghetti (unlocked after fishing up a Squid)
- Aji Fry (unlocked after fishing up a Horse Mackerel)
- Sardines in Oil (unlocked after fishing up an Anchovy)
Frequently Asked Questions
Question: In Animal Crossing, How do I Craft for Profit?
Answer: You can make a profit from crafting items by selling them at Nook’s Cranny if the item you are making is a hot item. Every day, Nook’s Cranny decides on an item that they deem to be a hot item. Selling hot items will reap you double the usual selling price of said item. For example, if the Frying Pan usually sells for 1500 Bells, and it is a hot item today, you can make one and sell it for 3000 Bells instead.
Question: How do I get a Crafting Table in Animal Crossing?
Answer: You can craft workbenches, which are crafting tables in Animal Crossing, to have one. A crafting table exists in the Resident Services Building. If you are in the early stages of the game, it is inside the tent on the plaza. Alternatively, you can buy one from Nook’s Cranny, though you can only buy one type of workbench, and it is the Cute DIY table.
Question: Can I Craft in Bulk in Animal Crossing?
Answer: Sadly, you cannot craft items in bulk in Animal Crossing. You can only craft them individually. E.g., if you want to craft ten Fish Bait, you need to make one ten times. For a game released in 2020, it has its weird quirks.
Conclusion: What are the Best Crafting Items in Animal Crossing?
It depends on what you intend to do with the crafting item. If you want to sell it, the best crafting item would be the robot hero because it sells for 250k Bells each. Of course, it is not easy to make, so it is not easy money. To build a robot hero, you would need a rocket, gold armor, 30 rusted parts, 90 iron nuggets, and ten gold nuggets. It is costly, which justifies its selling price.
If you want to place the crafting item on your island, I think the best one would be entirely up to your standards. For example, if I were building a space-themed island, the best crafting items would be from the DIY recipes I get from Celeste. Speaking of Celeste, I love her. I mentioned it previously, but I love all the items from her DIY recipes. I think space-themed items are the best crafting items.
Continue reading:
Ancient Statute Animal Crossing
Solemn Painting Animal Crossing
- Animal Crossing New Leaf vs New Horizons - May 27, 2023
- Wolfgang Animal Crossing Guide - March 7, 2023
- Eunice Animal Crossing Guide - February 24, 2023

